I am using TASImage to produce images that I am then using in a deep-learning context. For this, I am storing information in the alpha channel using the TASImage::GetArgbArray() function and using std::memcpy to copy an equally sized array to this address.
I then use the TASImage::WriteImage to save this data in PNG images. However, if I use the pngcheck tool on one of these images, I get back something like the following:
Are you saying that if you use TASImage::Open it will correctly retrieve the alpha channel?
I have tried to open the image using the PIL library for Python and it tells me it only has RGB layers too, perhaps there is a strange formatting issue in libAfterImage?
I think a workaround will be to save the alpha channel separately perhaps?
I am saying that if I generate an image with transparency using ROOT and save it as a png file then the transparency works.
{
   TCanvas *c1 = new TCanvas("c1", "c1",10,45,700,527);

   TEllipse *ellipse = new TEllipse(0.4326648,0.5926316,0.1561605,0.1105263,0,360,0);
   ellipse->SetFillColor(2);
   ellipse->Draw();

   ellipse = new TEllipse(0.4032951,0.6,0.0508596,0.2884211,0,360,0);

   Int_t ci;      // for color index setting
   TColor *color; // for color definition with alpha
   ci = 1180;
   color = new TColor(ci, 0.52, 0.76, 0.64, " ", 0.63);
   ellipse->SetFillColor(ci);
   ellipse->Draw();

}
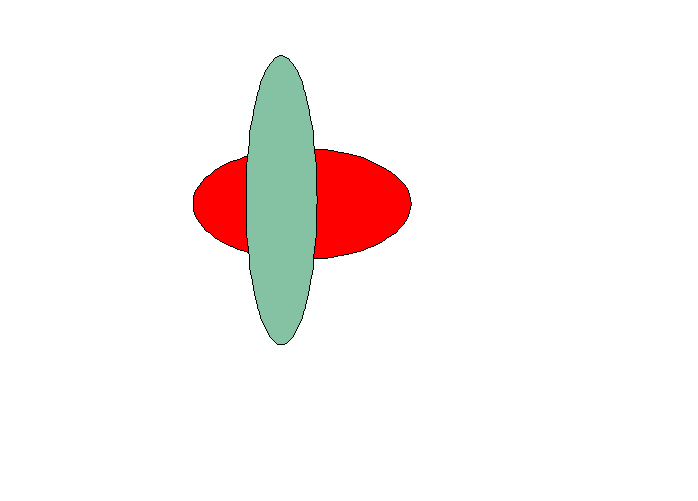
For me, even on the TCanvas, there is no transparancy. The red ellipse is strictly behind the green one and there is no change in colour in the green ellipse where the red ellipse is behind it.
Could you run the following for me, and let me know what the output is?
include "TROOT.h"
#include "TASImage.h"

#include <iostream>
#include <iomanip>
#include <set>

void imageTest()
{
    TASImage* image = static_cast<TASImage*>(TASImage::Open("test.png"));

    if (!image)
    {
        std::cerr << "Unable to open \"test.png\"" << std::endl;
        return;
    }

    TCanvas* canvas = new TCanvas("canvas", "Image Canvas", image->GetWidth(), image->GetHeight());

    image->Draw();

    // Check the image for any alpha transparancy:
    UInt_t* argbArray = image->GetArgbArray();
    unsigned char* channelArray = reinterpret_cast<unsigned char*>(argbArray);

    std::set<unsigned char> uniqueValues;
    for (std::size_t i = 0U; i < 4 * image->GetHeight() * image->GetWidth(); i += 4U)
    {
        uniqueValues.emplace( channelArray[i] );
    }

    std::cout << uniqueValues.size() << " unique alpha channel values found!\n\n";

    for (auto value : uniqueValues)
    {
        std::cout << static_cast<UInt_t>(value) << '\n';
    }
    std::cout << std::flush;
}
For me, this gives me a single unique alpha channel value, 255. Which suggests that the png file does indeed not have an alpha channel (so the libAfterImage library assumes that it is fully opaque).
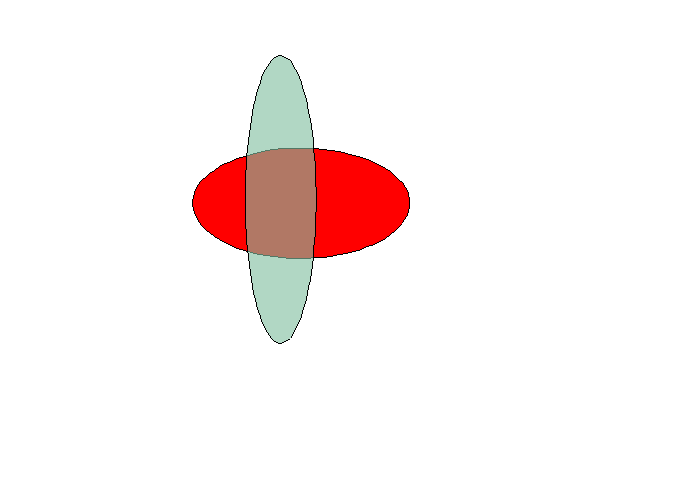
When I run the macro I sent you I get the following image. You can see it has transparency. Which root version are you using ? on which machine ? try to run in batch mode. Transparency does not work with X11.
I’m running on my local machine, running Ubuntu 16.04. I’m using ROOT version 6.08/00. However, my initial issue was generated whilst using ROOT 5.34.21 and Ubuntu 14.04. However, I do recover the same image as you if I run in batch mode.
However, if I rerun my previous macro in batch mode where I actively manipulate the alpha channel and then reload it using the other macro I posted, I find that there is still no alpha channel. And this appears to be the case regardless of the format that I save the image in.
Yes as i said you should run in batch mode to have the transparency. I am not sure how TAsimage generated transparency. May be it does it without using the alpha channel in png.